DXFViewer进行中 : ->封装OpenGL -> 解析DXF直线
DXFViewer进行中,目标造一个dxf看图工具。.
目标1:封装OpenGL,实现正交相机及平移缩放功能
Application.h
#pragma once
#include <string>
#include <glad/glad.h>
#include <GLFW/glfw3.h>
#include "../Core/TimeStamp.h"
#include "../Core/OrthoCamera.h"
class Application
{
public:Application();virtual ~Application();virtual void  Initialize(int width, int height, const char* title);  // 1.初始化virtual void  Run();	  virtual void  Startup();        // 1.准备数据virtual void  Render();         // 2.渲染数据virtual void  Shutdown();       // 3.关闭private:// 系统回调函数static void  ErrorCallback(int error, const char* description);static void  KeyCallback(GLFWwindow* window, int key, int scancode, int action, int mods);static void  MouseButtonCallback(GLFWwindow* window, int button, int action, int mods);static void  CursorPositionCallback(GLFWwindow* window, double xpos, double ypos);static void  WindowSizeCallback(GLFWwindow* window, int width, int height);static void  ScrollCallback(GLFWwindow* window, double xoffset, double yoffset);static Application* GetWindow(GLFWwindow* window); protected:int           m_winWidth = 0;int	          m_winHeight = 0;GLFWwindow* m_pWindow = nullptr;OrthoCamera   m_camera;        // 相机 double m_LastCursorX = 0.0;double m_LastCursorY = 0.0;bool m_MiddleButtonPressed = false;};
Application.cpp
#include "Application.h"
#include <algorithm>
#include <iostream>Application::Application() {}Application::~Application()
{glfwDestroyWindow(m_pWindow);glfwTerminate();exit(EXIT_SUCCESS);
}void Application::ErrorCallback(int error, const char* description)
{std::cerr << "Error: " << description << std::endl;
}void Application::KeyCallback(GLFWwindow* window, int key, int scancode, int action, int mods)
{// 键盘事件处理逻辑
}void Application::MouseButtonCallback(GLFWwindow* window, int button, int action, int mods)
{Application* app = GetWindow(window);if (button == GLFW_MOUSE_BUTTON_MIDDLE){if (action == GLFW_PRESS){app->m_MiddleButtonPressed = true;glfwGetCursorPos(window, &app->m_LastCursorX, &app->m_LastCursorY);// 设置抓手光标// glfwSetCursor(window, glfwCreateStandardCursor(GLFW_HAND_CURSOR));}else if (action == GLFW_RELEASE){app->m_MiddleButtonPressed = false;// 恢复默认箭头光标// glfwSetCursor(window, glfwCreateStandardCursor(GLFW_ARROW_CURSOR));}}
}void Application::CursorPositionCallback(GLFWwindow* window, double xpos, double ypos)
{Application* app = GetWindow(window);if (app->m_MiddleButtonPressed){double dx = xpos - app->m_LastCursorX;double dy = ypos - app->m_LastCursorY;app->m_LastCursorX = xpos;app->m_LastCursorY = ypos;glm::vec3 pos = app->m_camera.GetPosition();pos.x -= (dx / app->m_camera.GetZoom() * 0.5);pos.y += (dy / app->m_camera.GetZoom() * 0.5);//printf("pos.x = %f, pos.y = %f  \r\n", pos.x, pos.y);app->m_camera.SetPosition(pos);}
}void Application::WindowSizeCallback(GLFWwindow* window, int width, int height)
{Application* app = GetWindow(window);app->m_winWidth = width;app->m_winHeight = height;   app->m_camera.SetView(width, height);
}void Application::ScrollCallback(GLFWwindow* window, double xoffset, double yoffset)
{Application* app = GetWindow(window);// 1. 获取鼠标在窗口中的位置double mouseX, mouseY;glfwGetCursorPos(window, &mouseX, &mouseY);// 2. 将鼠标屏幕坐标转换为世界坐标float ndcX = (2.0f * static_cast<float>(mouseX)) / app->m_winWidth - 1.0f;float ndcY = 1.0f - (2.0f * static_cast<float>(mouseY)) / app->m_winHeight;glm::vec4 ndcPos = glm::vec4(ndcX, ndcY, 0.0f, 1.0f);glm::mat4 invVP = glm::inverse(app->m_camera.GetViewProjectionMatrix());glm::vec4 worldPosBeforeZoom = invVP * ndcPos;// 3. 执行缩放float zoom = app->m_camera.GetZoom();if (yoffset > 0)zoom *= 1.15f;elsezoom *= 0.85f;app->m_camera.SetZoom(zoom);// 4. 重新计算世界坐标invVP = glm::inverse(app->m_camera.GetViewProjectionMatrix());glm::vec4 worldPosAfterZoom = invVP * ndcPos;// 5. 保持鼠标位置不变:调整相机位置glm::vec3 camPos = app->m_camera.GetPosition();glm::vec3 offset = glm::vec3(worldPosBeforeZoom - worldPosAfterZoom); app->m_camera.SetPosition(camPos + glm::vec3(offset.x*0.5,offset.y*0.5,offset.z*0.5));}
// 获取窗口的用户数据
Application* Application::GetWindow(GLFWwindow* window)
{void* userdata = glfwGetWindowUserPointer(window);return reinterpret_cast<Application*>(userdata);
}void Application::Initialize(int width, int height, const char* title)
{if (!glfwInit()){exit(EXIT_FAILURE);}glfwWindowHint(GLFW_CONTEXT_VERSION_MAJOR, 3);glfwWindowHint(GLFW_CONTEXT_VERSION_MINOR, 3);glfwWindowHint(GLFW_OPENGL_PROFILE, GLFW_OPENGL_CORE_PROFILE);glfwWindowHint(GLFW_VISIBLE, GLFW_FALSE);m_pWindow = glfwCreateWindow(width, height, title, NULL, NULL);m_winWidth = width;m_winHeight = height;if (!m_pWindow){glfwTerminate();exit(EXIT_FAILURE);}glfwDefaultWindowHints();GLFWmonitor* primary = glfwGetPrimaryMonitor();const GLFWvidmode* mode = glfwGetVideoMode(primary);    // 设置窗口位置为屏幕中心glfwSetWindowPos(m_pWindow, (mode->width- width)/2, (mode->height - height) / 2);// 窗口的物理尺寸int widthMM, heightMM;glfwGetMonitorPhysicalSize(primary, &widthMM, &heightMM);// 计算 DPIfloat dpiX = static_cast<float>(mode->width) / (static_cast<float>(widthMM) );    float dpiY = static_cast<float>(mode->height) / (static_cast<float>(heightMM));glfwShowWindow(m_pWindow);// 设置 glfw 回调函数glfwSetKeyCallback(m_pWindow, KeyCallback);glfwSetMouseButtonCallback(m_pWindow, MouseButtonCallback);glfwSetCursorPosCallback(m_pWindow, CursorPositionCallback);glfwSetWindowSizeCallback(m_pWindow, WindowSizeCallback);glfwSetScrollCallback(m_pWindow, ScrollCallback);glfwMakeContextCurrent(m_pWindow);gladLoadGL();glfwSwapInterval(1); // 垂直同步glEnable(GL_DEPTH_TEST); // 开启深度测试// 设置相机m_camera.SetView(width, height);   glfwSetWindowUserPointer(m_pWindow, this);
}void Application::Run()
{Startup(); // 准备工作while (!glfwWindowShouldClose(m_pWindow)){glfwGetFramebufferSize(m_pWindow, &m_winWidth, &m_winHeight);glViewport(0, 0, m_winWidth, m_winHeight);glClear(GL_COLOR_BUFFER_BIT | GL_DEPTH_BUFFER_BIT);glClearColor(0.0f, 0.0f, 0.0f, 1.0f);Render(); // 渲染数据glfwSwapBuffers(m_pWindow);glfwWaitEvents(); // 等待事件}Shutdown(); // 关闭程序
}void Application::Startup()
{// 初始化数据
}void Application::Render()
{}void Application::Shutdown()
{// 清理资源
}
OrthoCamera.h
#pragma once#include <glm/glm.hpp>
#include <glm/gtc/matrix_transform.hpp>/// <summary>
/// 实现一个用于 2D 渲染的正交相机类。
/// 提供相机的位置、旋转、投影矩阵和视图矩阵等基本功能。
/// </summary>
class OrthoCamera
{
public:OrthoCamera();~OrthoCamera();public: void SetView(int windowWidth, int windowHeight);void SetView(float fixedHeight, int windowWidth, int windowHeight);void SetPosition(const glm::vec3& pos);void SetZoom(float zoom);const double& GetZoom() const { return m_Zoom ;} const glm::vec3& GetPosition() const { return m_Position; } const glm::mat4& GetViewProjectionMatrix() const { return m_ViewProjectionMatrix; };private:void RecalculateMatrix();glm::vec3 m_Position = { 0.0f, 0.0f, 0.0f };double m_Zoom = 200.0f;double m_FixedHeight = 1000.0f;int m_WindowWidth = 1280;int m_WindowHeight = 720;glm::mat4 m_ProjectionMatrix = glm::mat4(1.0f);glm::mat4 m_ViewMatrix = glm::mat4(1.0f);glm::mat4 m_ViewProjectionMatrix = glm::mat4(1.0f);
};
OrthoCamera.cpp
#include "OrthoCamera.h"OrthoCamera::OrthoCamera()
{
}OrthoCamera::~OrthoCamera()
{
}void OrthoCamera::SetView(int windowWidth, int windowHeight)
{m_FixedHeight = windowHeight;m_WindowWidth = windowWidth;m_WindowHeight = windowHeight;RecalculateMatrix();
}void OrthoCamera::SetView(float fixedHeight, int windowWidth, int windowHeight)
{m_FixedHeight = fixedHeight;m_WindowWidth = windowWidth;m_WindowHeight = windowHeight;RecalculateMatrix();
}void OrthoCamera::SetPosition(const glm::vec3& pos)
{m_Position = pos;RecalculateMatrix();
}void OrthoCamera::SetZoom(float zoom)
{m_Zoom = zoom;RecalculateMatrix();
}void OrthoCamera::RecalculateMatrix()
{float aspect = static_cast<float>(m_WindowWidth) / m_WindowHeight;float halfHeight = (m_FixedHeight * 0.5f) / m_Zoom;float halfWidth = halfHeight * aspect;float left = m_Position.x - halfWidth;float right = m_Position.x + halfWidth;float bottom = m_Position.y - halfHeight;float top = m_Position.y + halfHeight;m_ProjectionMatrix = glm::ortho(left, right, bottom, top, -1000.0f, 1000.0f); // 扩展 zNear/zFar 范围// 这里是关键:m_ViewMatrix = glm::translate(glm::mat4(1.0f), -m_Position); // x/y/z 都考虑进去m_ViewProjectionMatrix = m_ProjectionMatrix * m_ViewMatrix;
}
Triangle.h
#pragma once
#include "Entity.h"
#include "glm/glm.hpp"
#include "../Shader/Shader_P2_C3.h"
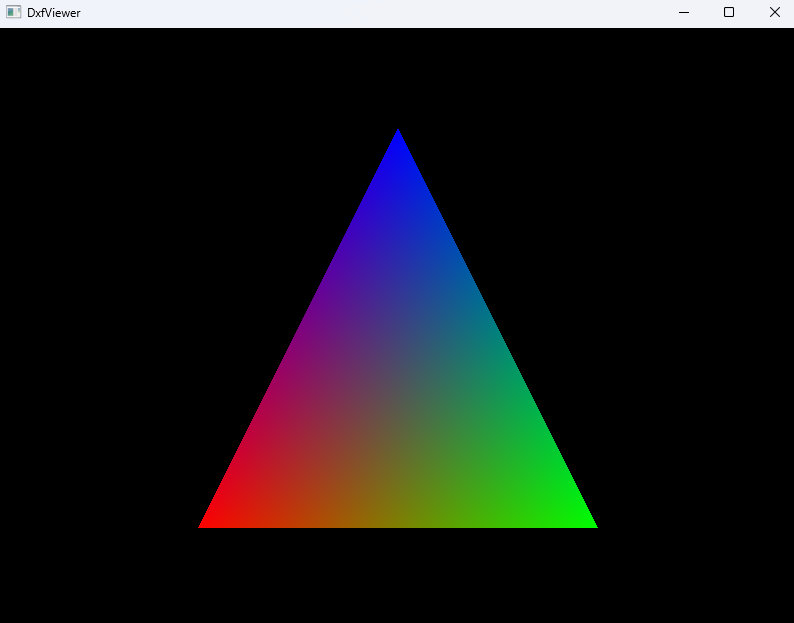
#include "../Core/OrthoCamera.h"class Triangle // : public Entity
{
public:Triangle(){m_vao = -1;m_vbo = -1;};~Triangle(){ glDeleteVertexArrays(1, &m_vao);glDeleteBuffers(1, &m_vbo); };virtual void Init() // 数据准备{ // 1.准备Shaderm_shader.Initialize();// 2.准备数据typedef struct Vertex{float x, y;float r, g, b;} Vertex;Vertex vertices[3] ={{ -1.0f, -1.0f , 1.f, 0.f, 0.f},{ 1.0f, -1.0f , 0.f, 1.f, 0.f},{ 0.f, 1.0f , 0.f, 0.f, 1.f}};// Shader应用绑定顶点缓冲区数据glGenVertexArrays(1, &m_vao);glBindVertexArray(m_vao);// 创建显存并向顶点缓冲填充数据glGenBuffers(1, &m_vbo);glBindBuffer(GL_ARRAY_BUFFER, m_vbo);glBufferData(GL_ARRAY_BUFFER, sizeof(vertices), vertices, GL_STATIC_DRAW);glVertexAttribPointer(m_shader.m_position, 2, GL_FLOAT, GL_FALSE, sizeof(Vertex), (void*)0);glEnableVertexAttribArray(m_shader.m_position);glVertexAttribPointer(m_shader.m_color, 3, GL_FLOAT, GL_FALSE, sizeof(Vertex), (void*)(2 * sizeof(float)));glEnableVertexAttribArray(m_shader.m_color);}virtual void Render(const OrthoCamera &camera) // 绘制{ m_shader.Begin();glBindVertexArray(m_vao);glUniformMatrix4fv(m_shader.m_mvp, 1, GL_FALSE, (const GLfloat*)&camera.GetViewProjectionMatrix());glDrawArrays(GL_TRIANGLES, 0, 3);m_shader.End();}public:unsigned m_vao;unsigned m_vbo;Shader_P2_C3 m_shader;};Shader_P2_C3.h
#pragma once
#include "Shader.h"
class Shader_P2_C3:public Shader
{public:Shader_P2_C3(){m_mvp      = -1;m_position = -1;m_color    = -1;};~Shader_P2_C3(){};virtual bool  Initialize(){const char* vs = R"(#version 330uniform mat4 MVP;in vec2 vPos;in vec3 vCol;out vec3 color;void main(){gl_Position = MVP * vec4(vPos, 0.0, 1.0);color = vCol;})";const char* ps = R"(#version 330in vec3 color;out vec4 fragment;void main(){fragment = vec4(color, 1.0);//fragment = vec4(1.0,1,0,0);})";bool    res = CreateShader(vs, ps);if (res){m_mvp      = glGetUniformLocation(m_shaderId, "MVP");m_position = glGetAttribLocation(m_shaderId,  "vPos");m_color    = glGetAttribLocation(m_shaderId,  "vCol");;}	return true;}public:int m_mvp;int m_position;int m_color;
};
Shader.h
#pragma once
#include <glad/glad.h>
#include <GLFW/glfw3.h>
#include <assert.h>
#include <map>
#include <glm/gtc/type_ptr.hpp>
#include <string>class Shader
{
public:Shader();~Shader();public:bool CreateShader(const char* vertex, const char* fragment);virtual void Begin();virtual void End();void SetVec3(const std::string& name, const float x, const float y, const float z)const{auto cit = uniform.find(name);glUniform3f(cit->second, x, y, z);}void SetVec3(const std::string& name, const glm::vec3& vec) const{auto cit = uniform.find(name);glUniform3f(cit->second, vec.x, vec.y, vec.z);}void SetMat4(const std::string& name, const glm::mat4& mat) const{auto cit = uniform.find(name);glUniformMatrix4fv(cit->second, 1, GL_FALSE, glm::value_ptr(mat));}void SetFloat(const std::string& name, const float x) const{auto cit = uniform.find(name);glUniform1f(cit->second, x);}void SetInt(const std::string& name, const int d)const{auto cit = uniform.find(name);glUniform1i(cit->second, d);        }
public:int  m_shaderId;std::map <std::string, unsigned> uniform;
};
Shader.cpp
#include "Shader.h"Shader::Shader():m_shaderId(0)
{
}Shader::~Shader()
{// 删除shaderglDeleteProgram(m_shaderId);
}bool Shader::CreateShader(const char* vertex, const char* fragment)
{bool error = false;int  vertexShader = 0;int  fragmentShader = 0;do{if (vertex){vertexShader = glCreateShader(GL_VERTEX_SHADER);glShaderSource(vertexShader, 1, &vertex, 0);glCompileShader(vertexShader);GLint   compileStatus;glGetShaderiv(vertexShader, GL_COMPILE_STATUS, &compileStatus);error = compileStatus == GL_FALSE;if (error){GLchar messages[256];glGetShaderInfoLog(vertexShader, sizeof(messages), 0, messages);assert(messages && 0 != 0);break;}}if (fragment){fragmentShader = glCreateShader(GL_FRAGMENT_SHADER);glShaderSource(fragmentShader, 1, &fragment, 0);glCompileShader(fragmentShader);GLint   compileStatus;glGetShaderiv(fragmentShader, GL_COMPILE_STATUS, &compileStatus);error = compileStatus == GL_FALSE;if (error){GLchar messages[256];glGetShaderInfoLog(fragmentShader, sizeof(messages), 0, messages);assert(messages && 0 != 0);break;}}m_shaderId = glCreateProgram();if (vertexShader){glAttachShader(m_shaderId, vertexShader);}if (fragmentShader){glAttachShader(m_shaderId, fragmentShader);}glLinkProgram(m_shaderId);GLint linkStatus;glGetProgramiv(m_shaderId, GL_LINK_STATUS, &linkStatus);if (linkStatus == GL_FALSE){GLchar messages[256];glGetProgramInfoLog(m_shaderId, sizeof(messages), 0, messages);break;}glUseProgram(m_shaderId);} while (false);if (error){if (fragmentShader){glDeleteShader(fragmentShader);fragmentShader = 0;}if (vertexShader){glDeleteShader(vertexShader);vertexShader = 0;}if (m_shaderId){glDeleteProgram(m_shaderId);m_shaderId = 0;}}return true;
}void Shader::Begin()
{glUseProgram(m_shaderId);}void Shader::End()
{glUseProgram(0);}
目标2:先解析DXF基础图元(直线)
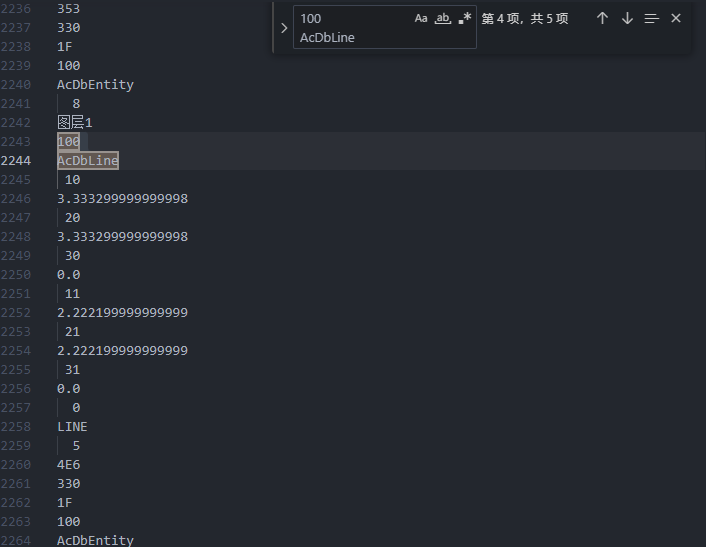
dxf选用格式为utf-8明文编码,一下是图层组码信息:100 AcDbLine (直线) 。
AutoCAD 2025 Developer and ObjectARX 帮助 | LINE (DXF) | Autodesk
根据官方文档解析直线->以下组码适用于直线图元。
| LINE 组码 | |
|---|---|
| 组码 | 说明 |
| 100 | 子类标记 (AcDbLine) |
| 39 | 厚度(可选;默认值 = 0) |
| 10 | 起点(在 WCS 中) DXF:X 值;APP:三维点 |
| 20, 30 | DXF:起点的 Y 值和 Z 值(在 WCS 中) |
| 11 | 端点(在 WCS 中) DXF:X 值;APP:三维点 |
| 21, 31 | DXF:端点的 Y 值和 Z 值(在 WCS 中) |
| 210 | 拉伸方向(可选;默认值 = 0, 0, 1) DXF:X 值;APP:三维矢量 |
| 220, 230 | DXF:拉伸方向的 Y 值和 Z 值(可选) |
#include <iostream>
#include <fstream>
#include <string>
#include <vector>
#include <map>
#include <Windows.h>using Entity = std::map<std::string, std::string>;
/// <summary>
/// ifstream和getline获取中文乱码解决方案
/// </summary>
std::string UTF8ToGB(const char* str)
{std::string result;WCHAR* strSrc;LPSTR szRes;//获得临时变量的大小int i = MultiByteToWideChar(CP_UTF8, 0, str, -1, NULL, 0);strSrc = new WCHAR[i + 1];MultiByteToWideChar(CP_UTF8, 0, str, -1, strSrc, i);//获得临时变量的大小i = WideCharToMultiByte(CP_ACP, 0, strSrc, -1, NULL, 0, NULL, NULL);szRes = new CHAR[i + 1];WideCharToMultiByte(CP_ACP, 0, strSrc, -1, szRes, i, NULL, NULL);result = szRes;delete[]strSrc;delete[]szRes;return result;
}// 去除前后空格
std::string trim(const std::string& str) {auto first = str.find_first_not_of(" \t\r\n");auto last = str.find_last_not_of(" \t\r\n");return (first == std::string::npos) ? "" : str.substr(first, last - first + 1);
}// 读取组码-值对
bool ReadCodes(std::ifstream& file, std::string& code, std::string& value) {if (!std::getline(file, code)) return false;if (!std::getline(file, value)) return false; std::string strCode = UTF8ToGB(code.c_str()).c_str();std::string strValue = UTF8ToGB(value.c_str()).c_str();code = trim(strCode);value = trim(strValue);return true;
}// 解析 DXF 中所有 LINE 实体的图层和坐标
std::vector<Entity> ParseDXFLines(const std::string& filename) {std::ifstream file(filename, std::ios::binary);if (!file.is_open()) {std::cerr << "无法打开文件: " << filename << std::endl;return {};}std::vector<Entity> lineEntities;Entity currentEntity;std::string code, value;std::string currentLayer;while (ReadCodes(file, code, value)) {// 处理每个 AcDbEntity 实体if (code == "100" && value == "AcDbEntity") {// 获取图层信息while (ReadCodes(file, code, value)) {if (code == "8") {currentLayer = value;  // 保存图层名break;}}}// 处理 AcDbLine 实体if (code == "100" && value == "AcDbLine") {Entity lineEntity;lineEntity["Layer"] = currentLayer; // 设置图层信息// 获取起点 (10, 20, 30)while (ReadCodes(file, code, value)) {if (code == "10") lineEntity["StartX"] = value;if (code == "20") lineEntity["StartY"] = value;if (code == "30") lineEntity["StartZ"] = value;// 获取终点 (11, 21, 31)if (code == "11") lineEntity["EndX"] = value;if (code == "21") lineEntity["EndY"] = value;if (code == "31") lineEntity["EndZ"] = value;// 检查是否处理完一个线段(可根据需要继续读取更多信息)if (lineEntity.size() == 6) {lineEntities.push_back(lineEntity);break;}}}}file.close();return lineEntities;
}int main()
{ std::string filename = R"(C:\Users\Desktop\Drawing1.dxf)";// 解析文件auto lines = ParseDXFLines(filename);// 输出解析的直线信息for (const auto& entity : lines) {std::string layer = entity.count("Layer") ? entity.at("Layer") : "(未知图层)";std::string x1 = entity.count("StartX") ? entity.at("StartX") : "?";std::string y1 = entity.count("StartY") ? entity.at("StartY") : "?";std::string x2 = entity.count("EndX") ? entity.at("EndX") : "?";std::string y2 = entity.count("EndY") ? entity.at("EndY") : "?";std::cout << "图层: " << layer<< ",起点: (" << x1 << ", " << y1 << ")"<< ",终点: (" << x2 << ", " << y2 << ")"<< std::endl;}return 0;
} 
相关文章:

DXFViewer进行中 : ->封装OpenGL -> 解析DXF直线
DXFViewer进行中,目标造一个dxf看图工具。. 目标1:封装OpenGL,实现正交相机及平移缩放功能 Application.h #pragma once #include <string> #include <glad/glad.h> #include <GLFW/glfw3.h> #include "../Core/TimeStamp.h" #includ…...

多序列比对软件MAFFT介绍
MAFFT(Multiple Alignment using Fast Fourier Transform)是一款广泛使用且高效的多序列比对软件,由日本京都大学的Katoh Kazutaka等人开发,最早发布于2002年,并持续迭代优化至今。 它支持从几十条到上万条核酸或蛋白质序列的快速比对,同时在准确率和计算效率之间提供灵…...

基于 HTML5 Canvas 实现图片旋转与下载功能
一、引言 在 Web 开发中,经常会遇到需要对图片进行处理并提供下载功能的需求。本文将深入剖析一段基于 HTML5 Canvas 的代码,该代码实现了图片的旋转(90 度和 180 度)以及旋转后图片的下载功能。通过对代码的解读,我们…...
)
学习路线(机器人系统)
机器人软件/系统学习路线(从初级到专家) 初级阶段(6-12个月)基础数学编程基础机器人基础概念推荐资源 中级阶段(1-2年)机器人运动学机器人动力学控制系统感知系统推荐资源 高级阶段(2-3年&#…...
)
基于EFISH-SCB-RK3576工控机/SAIL-RK3576核心板的网络安全防火墙技术方案(国产化替代J1900的全栈技术解析)
基于EFISH-SCB-RK3576/SAIL-RK3576的网络安全防火墙技术方案 (国产化替代J1900的全栈技术解析) 一、硬件架构设计 流量处理核心模块 多核异构架构: 四核Cortex-A72(2.3GHz):处理深度…...

基于 jQuery 实现复选框全选与选中项查询功能
在 Web 开发中,复选框是常见的交互元素,尤其是在涉及批量操作、数据筛选等场景时,全选功能和选中项查询功能显得尤为重要。本文将介绍如何使用 HTML、CSS 和 jQuery 实现一个具备全选、反选以及选中项查询功能的复选框组,帮助开发…...

Python中的JSON库,详细介绍与代码示例
目录 1. 前言 2. json 库基本概念 3. json 的适应场景 4. json 库的基本用法 4.1 导 json入 模块 4.2 将 Python 对象转换为 JSON 字符串 4.3 将 JSON 字符串转换为 Python 对象 4.4 将 Python 对象写入 JSON 文件 4.5 从 JSON 文件读取数据 4.6 json 的其他方法 5.…...

tensorflow 调试
tensorflow 调试 tf.config.experimental_run_functions_eagerly(True) 是 TensorFlow 中的一个配置函数,它的作用是: 让 tf.function 装饰的函数以 Eager 模式(即时执行)运行,而不是被编译成图(Graph&…...

iptables的基本选项及概念
目录 1.按保护范围划分: 2.iptables 的基础概念 4个规则表: 5个规则链: 3.iptables的基础选项 4.实验 1.按保护范围划分: 主机防火墙:服务范围为当前一台主机 input output 网络防火墙:服务范围为防…...

使用AI 将文本转成视频 工具 介绍
🎬 文字生成视频工具 一款为自媒体创作者设计的 全自动视频生成工具,输入文本即可输出高质量视频,大幅提升内容创作效率。视频演示:https://leeseean.github.io/Text2Video/?t23 ✨ 功能亮点 功能模块说明📝 智能分…...

Python生活手册-NumPy数组创建:从快递分拣到智能家居的数据容器
一、快递分拣系统(列表/元组转换) 1. 快递单号录入(np.array()) import numpy as np快递单号入库系统 快递单列表 ["SF123", "JD456", "EMS789"] 快递数组 np.array(快递单列表) print(f"…...

Cmake编译wxWidgets3.2.8
一、下载库源代码 去wxWidgets - Browse /v3.2.8 at SourceForge.net下载wxWidgets-3.2.8.7z 二、建立目录结构 1、在d:\codeblocks目录里新建wxWidgets_Src目录 2、把文件解压到该目录 3、建立 CB目录,并在该目录下分别建立 Debug 和 Release目录 三、使用Cmake…...

2.在Openharmony写hello world
原文链接:https://kashima19960.github.io/2025/03/21/openharmony/2.在Openharmony写hello%20world/ 前言 Openharmony 的第一个官方例程的是教你在Hi3861上编写hello world程序,这个例程相当简单编写 Hello World”程序,而且步骤也很省略&…...

「OC」源码学习——对象的底层探索
「OC」源码学习——对象的底层探索 前言 上次我们说到了源码里面的调用顺序,现在我们继续了解我们上一篇文章没有讲完的关于对象的内容函数,完整了解对象的产生对于isa赋值以及内存申请的内容 函数内容 先把_objc_rootAllocWithZone函数的内容先贴上…...

从0开始学习大模型--Day01--大模型是什么
初识大模型 在平时遇到问题时,我们总是习惯性地去运用各种搜索引擎如百度、知乎、CSDN等平台去搜索答案,但由于搜索到的内容质量参差不齐,检索到的内容只是单纯地根据关键字给出内容,往往看了几个网页都找不到答案;而…...

202533 | SpringBoot集成RocketMQ
SpringBoot集成RocketMQ极简入门 一、基础配置(3步完成) 添加依赖 <!-- pom.xml --> <dependency><groupId>org.apache.rocketmq</groupId><artifactId>rocketmq-spring-boot-starter</artifactId><version&g…...

大模型学习专栏-导航页
概要 本专栏是小编系统性调研大模型过程中沉淀的知识结晶,涵盖技术原理、实践应用、前沿动态等多维度内容。为助力读者高效学习,特整理此导航页,以清晰脉络串联核心知识点,搭建起系统的大模型学习框架,助您循序渐进掌握…...

互联网大厂Java面试:从Java SE到微服务的全栈挑战
场景概述 在这场面试中,谢飞机,一个搞笑但有些水的程序员,面对的是一位严肃的大厂面试官李严。面试官的目的是考察谢飞机在Java全栈开发,特别是微服务架构中的技术能力。面试场景设定在内容社区与UGC领域,模拟一个社交…...

2024年408真题及答案
2024年计算机408真题 2024年计算机408答案 2024 408真题下载链接 2024 408答案下载链接...

【datawhaleAI春训营】楼道图像分类
目录 图像分类任务的一般处理流程为什么使用深度学习迁移学习 加载实操环境的库加载数据集,默认data文件夹存储数据将图像类别进行编码自定义数据读取加载预训练模型模型训练,验证和预测划分验证集并训练模型 修改baseline处理输入数据选择合适的模型Ale…...
与持续检测键盘按键(Input.GetKey))
Unity:输入系统(Input System)与持续检测键盘按键(Input.GetKey)
目录 Unity 的两套输入系统: 🔍 Input.GetKey 详解 🎯 对比:常用的输入检测方法 技术底层原理(简化版) 示例:角色移动 为什么会被“新输入系统”替代? Unity 的两套输入系统&…...

day04_计算机常识丶基本数据类型转换
计算机常识 计算机如何存储数据 计算机底层只能识别二进制。计算机底层只识别二进制是因为计算机内部的电子元件只能识别两种状态,即开和关,或者高电平和低电平。二进制正好可以用两种状态来表示数字和字符,因此成为了计算机最基本的表示方…...
)
rvalue引用()
一、先确定基础:左值(Lvalue)和右值(Rvalue) 理解Rvalue引用,首先得搞清楚左值和右值的概念。 左值(Lvalue):有明确内存地址的表达式,可以取地址。比如变量名、引用等。 复制代码 int a = 10; // a是左值 int& ref = a; // ref也是左值右值(Rval…...

【Web3】上市公司利用RWA模式融资和促进业务发展案例
香港典型案例 朗新科技(充电桩RWA融资) 案例概述:2024年8月,朗新科技与蚂蚁数科合作,通过香港金管局“Ensemble沙盒”完成首单新能源充电桩资产代币化融资,募资1亿元人民币。技术实现:蚂蚁链提供…...

什么是IIC通信
IIC(Inter-Integrated Circuit),即IC,是一种串行通信总线,由飞利浦公司在1980年代开发,主要用于连接主板、嵌入式系统或手机中的低速外围设备1。IIC协议采用多主从架构,允许多个主设备和从设备连接在同一总线上进行通信。 IIC协议的工作原理: IIC协议使用两根信号线进…...

网络原理 TCP/IP
1.应用层 1.1自定义协议 客户端和服务器之间往往进行交互的是“结构化”数据,网络传输的数据是“字符串”“二进制bit流”,约定协议的过程就是把结构化”数据转成“字符串”或“二进制bit流”的过程. 序列化:把结构化”数据转成“字符串”…...

掌纹图像识别:解锁人类掌纹/生物识别的未来——技术解析与前沿数据集探索
概述 掌纹识别是一种利用手掌表面独特的线条、纹理和褶皱模式进行身份认证的生物识别技术。它具有非侵入性、高准确性和难以伪造的特点,被广泛应用于安全认证领域。以下将结合提供的链接,详细介绍掌纹识别的技术背景、数据集和研究进展。 提供的链接分析 香港理工大学掌纹数…...

【FPGA开发】Xilinx DSP48E2 slice 一个周期能做几次int8乘法或者加法?如何计算FPGA芯片的GOPS性能?
Xilinx DSP48E2 slice 在一个时钟周期内处理 INT8(8 位整数)运算的能力。 核心能力概述 一个 DSP48E2 slice 包含几个关键计算单元: 预加器 (Pre-Adder): 可以执行 A D 或 A - D 操作,其中 A 是 30 位,D 是 27 位。…...

APP 设计中的色彩心理学:如何用色彩提升用户体验
在数字化时代,APP 已成为人们日常生活中不可或缺的一部分。用户在打开一个 APP 的瞬间,首先映入眼帘的便是其色彩搭配,而这些色彩并非只是视觉上的装饰,它们蕴含着强大的心理暗示力量,能够潜移默化地影响用户的情绪、行…...

残差网络实战:基于MNIST数据集的手写数字识别
残差网络实战:基于MNIST数据集的手写数字识别 在深度学习的广阔领域中,卷积神经网络(CNN)一直是处理图像任务的主力军。随着研究的深入,网络层数的增加虽然理论上能提升模型的表达能力,但却面临梯度消失、…...

科学养生,开启健康生活新篇章
在快节奏的现代生活中,健康养生成为人们关注的焦点。科学合理的养生方式,能帮助我们远离疾病,提升生活质量,无需依赖传统中医理念,也能找到适合自己的养生之道。 饮食是养生的基础。遵循均衡饮食原则,每…...

如何扫描系统漏洞?漏洞扫描的原理是什么?
如何扫描系统漏洞?漏洞扫描的原理是什么? 漏洞扫描是网络安全中识别系统潜在风险的关键步骤,其核心原理是通过主动探测和自动化分析发现系统的安全弱点。以下是详细解答: 一、漏洞扫描的核心原理 主动探测技术 通过模拟攻击者的行为…...

Scrapy分布式爬虫实战:高效抓取的进阶之旅
引言 在2025年的数据狂潮中,单机爬虫如孤舟难敌巨浪,Scrapy分布式爬虫宛若战舰编队,扬帆远航,掠夺信息珍宝!继“动态网页”“登录网站”“经验总结”后,本篇献上Scrapy-Redis分布式爬虫实战,基于Quotes to Scrape,从单机到多机协同,代码简洁可运行,适合新手到老兵。…...
)
开元类双端互动组件部署实战全流程教程(第1部分:环境与搭建)
作者:一个曾在“组件卡死”里悟道的搬砖程序员 在面对一个看似华丽的开元类互动组件时,很多人以为“套个皮、配个资源”就能跑通。实际上,光是搞定环境配置、组件解析、控制端响应、前后端互联这些流程,已经足够让新手懵3天、老鸟…...

【实验笔记】Kylin-Desktop-V10-SP1麒麟系统知识 —— 开机自启Ollama
提示: 分享麒麟Kylin-Desktop-V10-SP1系统 离线部署Deepseek后,实现开机自动启动 Ollama 工具 的详细操作步骤 说明:离线安装ollama后,每次开机都需要手动启动,并且需要保持命令终端不能关闭;通过文档操作方法能实现开机自动后台启动 Ollama 工具 一、前期准备 1、离…...

Redis:现代服务端开发的缓存基石与电商实践-优雅草卓伊凡
Redis:现代服务端开发的缓存基石与电商实践-优雅草卓伊凡 一、Redis的本质与核心价值 1.1 Redis的技术定位 Redis(Remote Dictionary Server)是一个开源的内存数据结构存储系统,由Salvatore Sanfilippo于2009年创建。它不同于传…...
协议以及它的作用和影响)
认识并理解什么是链路层Frame-Relay(帧中继)协议以及它的作用和影响
帧中继(Frame Relay)是一种高效的数据链路层协议,主要用于广域网(WAN)中实现多节点之间的数据通信。它通过**虚电路(Virtual Circuit)**和统计复用技术,优化了传统分组交换网络(如X.25)的性能,特别适合带宽需求高、时延敏感的场景。 一、帧中继的核心设计目标 简化协…...
)
Python基本语法(类和实例)
类和实例 类和对象是面向对象编程的两个主要方面。类创建一个新类型,而对象是这个 类的实例,类使用class关键字创建。类的域和方法被列在一个缩进块中,一般函数 也可以被叫作方法。 (1)类的变量:甴一个类…...

Netty的内存池机制怎样设计的?
大家好,我是锋哥。今天分享关于【Netty的内存池机制怎样设计的?】面试题。希望对大家有帮助; Netty的内存池机制怎样设计的? 1000道 互联网大厂Java工程师 精选面试题-Java资源分享网 Netty的内存池机制是为了提高性能ÿ…...
-绘画and动画)
Python学习之路(七)-绘画and动画
Python 虽然不是专为图形设计或动画开发的语言,但凭借其丰富的第三方库,依然可以实现 2D/3D 绘画、交互式绘图、动画制作、游戏开发 等功能。以下是 Python 在绘画和动画方面的主流支持方式及推荐库。建议前端web端展示还是用其他语言好╮(╯▽╰)╭ 一、Python 绘画支持(2D…...

【HarmonyOS 5】鸿蒙应用数据安全详解
【HarmonyOS 5】鸿蒙应用数据安全详解 一、前言 大家平时用手机、智能手表的时候,最担心什么?肯定是自己的隐私数据会不会泄露!今天就和大家唠唠HarmonyOS是怎么把应用安全这块“盾牌”打造得明明白白的,从里到外保护我们的信息…...

动态指令参数:根据组件状态调整指令行为
🤍 前端开发工程师、技术日更博主、已过CET6 🍨 阿珊和她的猫_CSDN博客专家、23年度博客之星前端领域TOP1 🕠 牛客高级专题作者、打造专栏《前端面试必备》 、《2024面试高频手撕题》、《前端求职突破计划》 🍚 蓝桥云课签约作者、…...

Linux:权限的理解
目录 引言:为何Linux需要权限? 一、用户分类与切换 1.1、用户角色 1.2、用户切换命令 二、权限的基础概念 2.1、文件属性 三、权限的管理指令 3.1、chmod:修改文件权限 3.2、chown与chgro:修改拥有者与所属组 四、粘滞位…...

/etc/kdump.conf 配置详解
/etc/kdump.conf 是 Linux kdump 机制的核心配置文件,用于定义内核崩溃转储(vmcore)的生成规则、存储位置、过滤条件及触发后的自定义操作。以下是对其配置项的详细解析及常见用法示例: 一、配置文件结构 文件通常位于 /etc/kdu…...
的深入解析)
Redis 中简单动态字符串(SDS)的深入解析
在 Redis 中,简单动态字符串(Simple Dynamic String,SDS)是一种非常重要的数据结构,它在 Redis 的底层实现中扮演着关键角色。本文将详细介绍 SDS 的结构、Redis 使用 SDS 的原因以及 SDS 的主要 API 及其源码解析。 …...

GPIO引脚的上拉下拉以及转换速度到底怎么选
【摘要】本文讲述在进行单片机开发当中,新手小白常常为GPIO端口的种种设置感到迷惑,例如到底设置什么模式?它们之间的区别是什么?到底是设置上拉还是下拉电阻,有什么讲究?端口的输出速度又该如何设置&#…...

day16 numpy和shap深入理解
NumPy数组的创建 NumPy数组是Python中用于存储和操作大型多维数组和矩阵的主要工具。NumPy数组的创建非常灵活,可以接受各种“序列型”对象作为输入参数来创建数组。这意味着你可以将Python的列表(List)、元组(Tuple)…...

深入探索 51 单片机:从入门到实践的全面指南
深入探索 51 单片机:从入门到实践的全面指南 一、引言 在嵌入式系统发展的漫长历程中,51 单片机犹如一颗璀璨的明星,虽然诞生已有数十年,但至今仍在众多领域发挥着重要作用。它以结构简单、易于学习、成本低廉等优势,…...

架构思维:构建高并发读服务_热点数据查询的架构设计与性能调优
文章目录 一、引言二、热点查询定义与场景三、主从复制——垂直扩容四、应用内前置缓存4.1 容量上限与淘汰策略4.2 延迟刷新:定期 vs. 实时4.3 逃逸流量控制4.4 热点发现:被动 vs. 主动 五、降级与限流兜底六、前端/接入层其他应对七、模拟压…...

时间同步服务核心知识笔记:原理、配置与故障排除
一、时间同步服务 在 Linux 系统中,准确的时间至关重要。对于服务器集群,时间同步确保各节点间数据处理和交互的一致性,避免因时间差异导致的事务处理错误、日志记录混乱等问题。在分布式系统中,时间同步有助于协调任务调度、数据…...