apache http client连接池实现原理
在java开发中我们经常会涉及到http 请求接口,一般有几种方式:
- java自带的 HttpURLConnection
- okHttpClient
- apache http client
一般我们使用apache http client会比较多点,在代码中会进行如下调用方式:
private static class HttpClientPool {private static CloseableHttpClient httpClient;private static PoolingHttpClientConnectionManager HTTP_CLIENT_POOL = new PoolingHttpClientConnectionManager();static {//连接池最大连接数:300HTTP_CLIENT_POOL.setMaxTotal(300);// 每个路由的最大连接数HTTP_CLIENT_POOL.setDefaultMaxPerRoute(50);if (httpClient == null) {httpClient = HttpClients.custom().setConnectionManager(HTTP_CLIENT_POOL).setDefaultRequestConfig(RequestConfig.custom().setConnectTimeout(10000).setSocketTimeout(10000).build()).setDefaultSocketConfig(SocketConfig.custom().setSoTimeout(10000).build()).build();}Runtime.getRuntime().addShutdownHook(new Thread(() -> {try {httpClient.close();HTTP_CLIENT_POOL.close();} catch (Exception e) {LoggerFactory.getLogger(com.ipinyou.mip.base.utils.HttpClientHolder.class).error("关闭httpClient 连接池失败!", e);}}));}public static CloseableHttpClient getHttpClient() {return httpClient;}}private static HttpResponseValue httpCallWithHttpClient(String url, HttpMethodEnum method, Map<String, String> formData, String jsonData, Map<String, String> headers) {HttpResponseValue responseValue = new HttpResponseValue();if (url == null || StringUtils.isBlank(url)) {log.info("url is empty,return ");return responseValue;}long start = System.currentTimeMillis();HttpPost post = null;HttpGet get = null;try {// 设置请求超时时间为 10 分钟RequestConfig requestConfig = RequestConfig.custom().setConnectTimeout(HTTP_CONNECT_TIMEOUT_MS) // 连接超时时间.setSocketTimeout(HTTP_CONNECT_TIMEOUT_MS) // 数据传输超时时间.build();if (method == HttpMethodEnum.POST) {post = new HttpPost(url);post.setConfig(requestConfig);if (headers != null && !headers.isEmpty()) {for (Map.Entry<String, String> kv : headers.entrySet()) {post.addHeader(kv.getKey(), kv.getValue());}}if (formData != null && !formData.isEmpty()) {List<NameValuePair> nvps = new ArrayList<>();formData.forEach((k, v) -> nvps.add(new BasicNameValuePair(k, v)));post.setEntity(new UrlEncodedFormEntity(nvps, DEFAULT_UTF8_ENCODING));} else if (StringUtils.isNotBlank(jsonData)) {StringEntity entity = new StringEntity(jsonData, ContentType.APPLICATION_JSON);entity.setContentEncoding(new BasicHeader(HTTP.CONTENT_TYPE, CONTENT_TYPE_APPLICATION_JSON));post.setEntity(entity);}}if (method == HttpMethodEnum.GET) {get = new HttpGet();get.setConfig(requestConfig);}CloseableHttpClient client = HttpClientPool.getHttpClient();//entity编码指定urf-8CloseableHttpResponse response = null;if (method == HttpMethodEnum.GET) {response = client.execute(get);} else {response = client.execute(post);}HttpEntity entity = response.getEntity();if (entity != null) {responseValue.content = EntityUtils.toString(entity, DEFAULT_UTF8_ENCODING);}response.close();responseValue.code = 200;} catch (Exception e) {log.info("httpCallWithHttpClient failed: {} ", e);} finally {log.info("httpCallWithHttpClient url=[{}],cost={} ms,", url, (System.currentTimeMillis() - start));}return responseValue;}
今天我们来研究下,apache http client的源码。
HttpClient是其内部一个抽象接口:
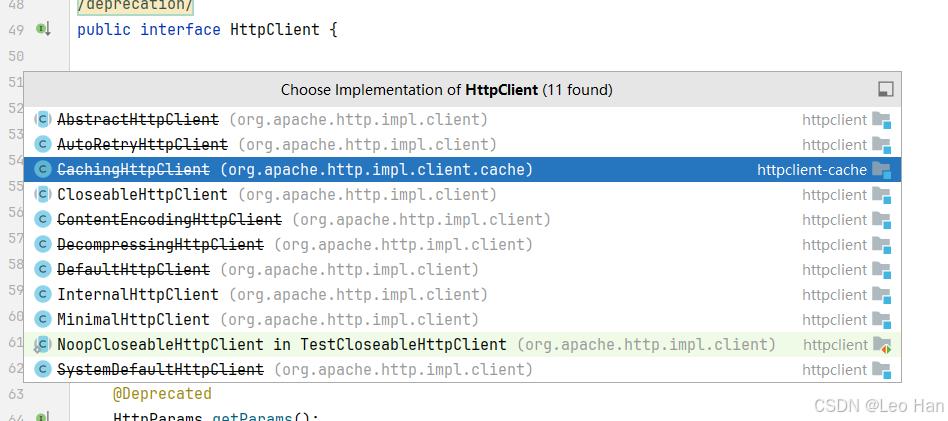
这里我们以InternalHttpClient为例来研究(CloseableHttpClient是一个抽象类):
public CloseableHttpResponse execute(final HttpHost target,final HttpRequest request,final HttpContext context) throws IOException, ClientProtocolException {return doExecute(target, request, context);}protected CloseableHttpResponse doExecute(final HttpHost target,final HttpRequest request,final HttpContext context) throws IOException, ClientProtocolException {Args.notNull(request, "HTTP request");HttpExecutionAware execAware = null;if (request instanceof HttpExecutionAware) {execAware = (HttpExecutionAware) request;}try {final HttpRequestWrapper wrapper = HttpRequestWrapper.wrap(request, target);final HttpClientContext localcontext = HttpClientContext.adapt(context != null ? context : new BasicHttpContext());RequestConfig config = null;if (request instanceof Configurable) {config = ((Configurable) request).getConfig();}if (config == null) {final HttpParams params = request.getParams();if (params instanceof HttpParamsNames) {if (!((HttpParamsNames) params).getNames().isEmpty()) {config = HttpClientParamConfig.getRequestConfig(params, this.defaultConfig);}} else {config = HttpClientParamConfig.getRequestConfig(params, this.defaultConfig);}}if (config != null) {localcontext.setRequestConfig(config);}setupContext(localcontext);final HttpRoute route = determineRoute(target, wrapper, localcontext);return this.execChain.execute(route, wrapper, localcontext, execAware);} catch (final HttpException httpException) {throw new ClientProtocolException(httpException);}}
实际执行发送请求是在InternalHttpClient中,发送时会根据determineRoute来确定本次请求的路径,请求中的HttpPost、HttpGet都是实现了HttpUriRequest接口,在请求前,会通过HttpUriRequest获取到请求的地址信息,将其封装到HttpHost中,主要包含如下信息:
public final class HttpHost implements java.lang.Cloneable, java.io.Serializable {public static final java.lang.String DEFAULT_SCHEME_NAME = "http";protected final java.lang.String hostname;protected final java.lang.String lcHostname;protected final int port;protected final java.lang.String schemeName;protected final java.net.InetAddress address;@Overridepublic boolean equals(final Object obj) {if (this == obj) {return true;}if (obj instanceof HttpHost) {final HttpHost that = (HttpHost) obj;return this.lcHostname.equals(that.lcHostname)&& this.port == that.port&& this.schemeName.equals(that.schemeName)&& (this.address==null ? that.address== null : this.address.equals(that.address));} else {return false;}}@Overridepublic int hashCode() {int hash = LangUtils.HASH_SEED;hash = LangUtils.hashCode(hash, this.lcHostname);hash = LangUtils.hashCode(hash, this.port);hash = LangUtils.hashCode(hash, this.schemeName);if (address!=null) {hash = LangUtils.hashCode(hash, address);}return hash;}}
可以看到,主要包含了请求地址host,端口,协议(http、https),尤其需要注意其重写了equals和hashCode方法,可以看到,判断两个HttpHost 是否一样,主要是看协议(http、https)、地址、端口号
然后根据通过routePlanner.determineRoute将HttpHost和一些其他信息封装到HttpRoute,表示一个请求的路由信息:
public final class HttpRoute implements RouteInfo, Cloneable {
private final HttpHost targetHost;private final InetAddress localAddress;private final List<HttpHost> proxyChain;private final TunnelType tunnelled;private final LayerType layered;private final boolean secure;@Overridepublic final boolean equals(final Object obj) {if (this == obj) {return true;}if (obj instanceof HttpRoute) {final HttpRoute that = (HttpRoute) obj;return// Do the cheapest tests first(this.secure    == that.secure) &&(this.tunnelled == that.tunnelled) &&(this.layered   == that.layered) &&LangUtils.equals(this.targetHost, that.targetHost) &&LangUtils.equals(this.localAddress, that.localAddress) &&LangUtils.equals(this.proxyChain, that.proxyChain);} else {return false;}}@Overridepublic final int hashCode() {int hash = LangUtils.HASH_SEED;hash = LangUtils.hashCode(hash, this.targetHost);hash = LangUtils.hashCode(hash, this.localAddress);if (this.proxyChain != null) {for (final HttpHost element : this.proxyChain) {hash = LangUtils.hashCode(hash, element);}}hash = LangUtils.hashCode(hash, this.secure);hash = LangUtils.hashCode(hash, this.tunnelled);hash = LangUtils.hashCode(hash, this.layered);return hash;}
}
需要注意的是,HttpRoute 重写了equals和hashCode方法,也就是说,一般常规情况下,两个HttpRoute 是否相等,主要就是协议、地址、端口号,也就是说,我们经常设置的连接池的setDefaultMaxPerRoute这里设置的是协议、地址、端口号 为分类
通过HttpRoute,apache http client将会找到服务端并建立连接。
加下来通过ClientExecChain进行请求的发送:
public interface ClientExecChain {CloseableHttpResponse execute(HttpRoute route,HttpRequestWrapper request,HttpClientContext clientContext,HttpExecutionAware execAware) throws IOException, HttpException;}
其主要实现类为MainClientExec:
public CloseableHttpResponse execute(final HttpRoute route,final HttpRequestWrapper request,final HttpClientContext context,final HttpExecutionAware execAware) throws IOException, HttpException {Args.notNull(route, "HTTP route");Args.notNull(request, "HTTP request");Args.notNull(context, "HTTP context");AuthState targetAuthState = context.getTargetAuthState();if (targetAuthState == null) {targetAuthState = new AuthState();context.setAttribute(HttpClientContext.TARGET_AUTH_STATE, targetAuthState);}AuthState proxyAuthState = context.getProxyAuthState();if (proxyAuthState == null) {proxyAuthState = new AuthState();context.setAttribute(HttpClientContext.PROXY_AUTH_STATE, proxyAuthState);}if (request instanceof HttpEntityEnclosingRequest) {RequestEntityProxy.enhance((HttpEntityEnclosingRequest) request);}Object userToken = context.getUserToken();final ConnectionRequest connRequest = connManager.requestConnection(route, userToken);if (execAware != null) {if (execAware.isAborted()) {connRequest.cancel();throw new RequestAbortedException("Request aborted");} else {execAware.setCancellable(connRequest);}}final RequestConfig config = context.getRequestConfig();final HttpClientConnection managedConn;try {final int timeout = config.getConnectionRequestTimeout();managedConn = connRequest.get(timeout > 0 ? timeout : 0, TimeUnit.MILLISECONDS);} catch(final InterruptedException interrupted) {Thread.currentThread().interrupt();throw new RequestAbortedException("Request aborted", interrupted);} catch(final ExecutionException ex) {Throwable cause = ex.getCause();if (cause == null) {cause = ex;}throw new RequestAbortedException("Request execution failed", cause);}context.setAttribute(HttpCoreContext.HTTP_CONNECTION, managedConn);if (config.isStaleConnectionCheckEnabled()) {// validate connectionif (managedConn.isOpen()) {this.log.debug("Stale connection check");if (managedConn.isStale()) {this.log.debug("Stale connection detected");managedConn.close();}}}final ConnectionHolder connHolder = new ConnectionHolder(this.log, this.connManager, managedConn);try {if (execAware != null) {execAware.setCancellable(connHolder);}HttpResponse response;for (int execCount = 1;; execCount++) {if (execCount > 1 && !RequestEntityProxy.isRepeatable(request)) {throw new NonRepeatableRequestException("Cannot retry request " +"with a non-repeatable request entity.");}if (execAware != null && execAware.isAborted()) {throw new RequestAbortedException("Request aborted");}if (!managedConn.isOpen()) {this.log.debug("Opening connection " + route);try {establishRoute(proxyAuthState, managedConn, route, request, context);} catch (final TunnelRefusedException ex) {if (this.log.isDebugEnabled()) {this.log.debug(ex.getMessage());}response = ex.getResponse();break;}}final int timeout = config.getSocketTimeout();if (timeout >= 0) {managedConn.setSocketTimeout(timeout);}if (execAware != null && execAware.isAborted()) {throw new RequestAbortedException("Request aborted");}if (this.log.isDebugEnabled()) {this.log.debug("Executing request " + request.getRequestLine());}if (!request.containsHeader(AUTH.WWW_AUTH_RESP)) {if (this.log.isDebugEnabled()) {this.log.debug("Target auth state: " + targetAuthState.getState());}this.authenticator.generateAuthResponse(request, targetAuthState, context);}if (!request.containsHeader(AUTH.PROXY_AUTH_RESP) && !route.isTunnelled()) {if (this.log.isDebugEnabled()) {this.log.debug("Proxy auth state: " + proxyAuthState.getState());}this.authenticator.generateAuthResponse(request, proxyAuthState, context);}response = requestExecutor.execute(request, managedConn, context);// The connection is in or can be brought to a re-usable state.if (reuseStrategy.keepAlive(response, context)) {// Set the idle duration of this connectionfinal long duration = keepAliveStrategy.getKeepAliveDuration(response, context);if (this.log.isDebugEnabled()) {final String s;if (duration > 0) {s = "for " + duration + " " + TimeUnit.MILLISECONDS;} else {s = "indefinitely";}this.log.debug("Connection can be kept alive " + s);}connHolder.setValidFor(duration, TimeUnit.MILLISECONDS);connHolder.markReusable();} else {connHolder.markNonReusable();}if (needAuthentication(targetAuthState, proxyAuthState, route, response, context)) {// Make sure the response body is fully consumed, if presentfinal HttpEntity entity = response.getEntity();if (connHolder.isReusable()) {EntityUtils.consume(entity);} else {managedConn.close();if (proxyAuthState.getState() == AuthProtocolState.SUCCESS&& proxyAuthState.getAuthScheme() != null&& proxyAuthState.getAuthScheme().isConnectionBased()) {this.log.debug("Resetting proxy auth state");proxyAuthState.reset();}if (targetAuthState.getState() == AuthProtocolState.SUCCESS&& targetAuthState.getAuthScheme() != null&& targetAuthState.getAuthScheme().isConnectionBased()) {this.log.debug("Resetting target auth state");targetAuthState.reset();}}// discard previous auth headersfinal HttpRequest original = request.getOriginal();if (!original.containsHeader(AUTH.WWW_AUTH_RESP)) {request.removeHeaders(AUTH.WWW_AUTH_RESP);}if (!original.containsHeader(AUTH.PROXY_AUTH_RESP)) {request.removeHeaders(AUTH.PROXY_AUTH_RESP);}} else {break;}}if (userToken == null) {userToken = userTokenHandler.getUserToken(context);context.setAttribute(HttpClientContext.USER_TOKEN, userToken);}if (userToken != null) {connHolder.setState(userToken);}// check for entity, release connection if possiblefinal HttpEntity entity = response.getEntity();if (entity == null || !entity.isStreaming()) {// connection not needed and (assumed to be) in re-usable stateconnHolder.releaseConnection();return new HttpResponseProxy(response, null);} else {return new HttpResponseProxy(response, connHolder);}} catch (final ConnectionShutdownException ex) {final InterruptedIOException ioex = new InterruptedIOException("Connection has been shut down");ioex.initCause(ex);throw ioex;} catch (final HttpException ex) {connHolder.abortConnection();throw ex;} catch (final IOException ex) {connHolder.abortConnection();throw ex;} catch (final RuntimeException ex) {connHolder.abortConnection();throw ex;}}
实际发送的这个方法比较长,我们分几段看。
第一步是根据上述的HttpRoute和服务端建立TCP连接
通过connManager.requestConnection(route, userToken);建立连接,在HttpClientBuilder中,设置connManager为PoolingHttpClientConnectionManager
public ConnectionRequest requestConnection(final HttpRoute route,final Object state) {Args.notNull(route, "HTTP route");if (this.log.isDebugEnabled()) {this.log.debug("Connection request: " + format(route, state) + formatStats(route));}final Future<CPoolEntry> future = this.pool.lease(route, state, null);return new ConnectionRequest() {@Overridepublic boolean cancel() {return future.cancel(true);}@Overridepublic HttpClientConnection get(final long timeout,final TimeUnit tunit) throws InterruptedException, ExecutionException, ConnectionPoolTimeoutException {return leaseConnection(future, timeout, tunit);}};}
上面这一连串下来,起始就是要通过中连接池拿连接,建立连接的实际调用在其父类AbstractConnPool中:
private E getPoolEntryBlocking(final T route, final Object state,final long timeout, final TimeUnit tunit,final Future<E> future) throws IOException, InterruptedException, TimeoutException {Date deadline = null;if (timeout > 0) {deadline = new Date (System.currentTimeMillis() + tunit.toMillis(timeout));}this.lock.lock();try {final RouteSpecificPool<T, C, E> pool = getPool(route);E entry;for (;;) {Asserts.check(!this.isShutDown, "Connection pool shut down");for (;;) {entry = pool.getFree(state);if (entry == null) {break;}if (entry.isExpired(System.currentTimeMillis())) {entry.close();}if (entry.isClosed()) {this.available.remove(entry);pool.free(entry, false);} else {break;}}if (entry != null) {this.available.remove(entry);this.leased.add(entry);onReuse(entry);return entry;}// New connection is neededfinal int maxPerRoute = getMax(route);// Shrink the pool prior to allocating a new connectionfinal int excess = Math.max(0, pool.getAllocatedCount() + 1 - maxPerRoute);if (excess > 0) {for (int i = 0; i < excess; i++) {final E lastUsed = pool.getLastUsed();if (lastUsed == null) {break;}lastUsed.close();this.available.remove(lastUsed);pool.remove(lastUsed);}}if (pool.getAllocatedCount() < maxPerRoute) {final int totalUsed = this.leased.size();final int freeCapacity = Math.max(this.maxTotal - totalUsed, 0);if (freeCapacity > 0) {final int totalAvailable = this.available.size();if (totalAvailable > freeCapacity - 1) {if (!this.available.isEmpty()) {final E lastUsed = this.available.removeLast();lastUsed.close();final RouteSpecificPool<T, C, E> otherpool = getPool(lastUsed.getRoute());otherpool.remove(lastUsed);}}final C conn = this.connFactory.create(route);entry = pool.add(conn);this.leased.add(entry);return entry;}}boolean success = false;try {if (future.isCancelled()) {throw new InterruptedException("Operation interrupted");}pool.queue(future);this.pending.add(future);if (deadline != null) {success = this.condition.awaitUntil(deadline);} else {this.condition.await();success = true;}if (future.isCancelled()) {throw new InterruptedException("Operation interrupted");}} finally {pool.unqueue(future);this.pending.remove(future);}if (!success && (deadline != null && deadline.getTime() <= System.currentTimeMillis())) {break;}}throw new TimeoutException("Timeout waiting for connection");} finally {this.lock.unlock();}}这里面当连接不够时,如果没超过maxPerRoute和maxTotal就会在创建一个链接,最终通过ManagedHttpClientConnectionFactory创建:
public ManagedHttpClientConnection create(final HttpRoute route, final ConnectionConfig config) {final ConnectionConfig cconfig = config != null ? config : ConnectionConfig.DEFAULT;CharsetDecoder chardecoder = null;CharsetEncoder charencoder = null;final Charset charset = cconfig.getCharset();final CodingErrorAction malformedInputAction = cconfig.getMalformedInputAction() != null ?cconfig.getMalformedInputAction() : CodingErrorAction.REPORT;final CodingErrorAction unmappableInputAction = cconfig.getUnmappableInputAction() != null ?cconfig.getUnmappableInputAction() : CodingErrorAction.REPORT;if (charset != null) {chardecoder = charset.newDecoder();chardecoder.onMalformedInput(malformedInputAction);chardecoder.onUnmappableCharacter(unmappableInputAction);charencoder = charset.newEncoder();charencoder.onMalformedInput(malformedInputAction);charencoder.onUnmappableCharacter(unmappableInputAction);}final String id = "http-outgoing-" + Long.toString(COUNTER.getAndIncrement());return new LoggingManagedHttpClientConnection(id,log,headerlog,wirelog,cconfig.getBufferSize(),cconfig.getFragmentSizeHint(),chardecoder,charencoder,cconfig.getMessageConstraints(),incomingContentStrategy,outgoingContentStrategy,requestWriterFactory,responseParserFactory);}
到这里我们获取到了一个HttpClientConnection,但是这个时候并没有建立真正的连接。加下来通过:
 this.connManager.connect(managedConn,route,timeout > 0 ? timeout : 0,context);
public void  connect(final HttpClientConnection managedConn,final HttpRoute route,final int connectTimeout,final HttpContext context) throws IOException {Args.notNull(managedConn, "Managed Connection");Args.notNull(route, "HTTP route");final ManagedHttpClientConnection conn;synchronized (managedConn) {final CPoolEntry entry = CPoolProxy.getPoolEntry(managedConn);conn = entry.getConnection();}final HttpHost host;if (route.getProxyHost() != null) {host = route.getProxyHost();} else {host = route.getTargetHost();}final InetSocketAddress localAddress = route.getLocalSocketAddress();SocketConfig socketConfig = this.configData.getSocketConfig(host);if (socketConfig == null) {socketConfig = this.configData.getDefaultSocketConfig();}if (socketConfig == null) {socketConfig = SocketConfig.DEFAULT;}this.connectionOperator.connect(conn, host, localAddress, connectTimeout, socketConfig, context);} public void connect(final ManagedHttpClientConnection conn,final HttpHost host,final InetSocketAddress localAddress,final int connectTimeout,final SocketConfig socketConfig,final HttpContext context) throws IOException {final Lookup<ConnectionSocketFactory> registry = getSocketFactoryRegistry(context);final ConnectionSocketFactory sf = registry.lookup(host.getSchemeName());if (sf == null) {throw new UnsupportedSchemeException(host.getSchemeName() +" protocol is not supported");}final InetAddress[] addresses = host.getAddress() != null ?new InetAddress[] { host.getAddress() } : this.dnsResolver.resolve(host.getHostName());final int port = this.schemePortResolver.resolve(host);for (int i = 0; i < addresses.length; i++) {final InetAddress address = addresses[i];final boolean last = i == addresses.length - 1;Socket sock = sf.createSocket(context);sock.setSoTimeout(socketConfig.getSoTimeout());sock.setReuseAddress(socketConfig.isSoReuseAddress());sock.setTcpNoDelay(socketConfig.isTcpNoDelay());sock.setKeepAlive(socketConfig.isSoKeepAlive());if (socketConfig.getRcvBufSize() > 0) {sock.setReceiveBufferSize(socketConfig.getRcvBufSize());}if (socketConfig.getSndBufSize() > 0) {sock.setSendBufferSize(socketConfig.getSndBufSize());}final int linger = socketConfig.getSoLinger();if (linger >= 0) {sock.setSoLinger(true, linger);}conn.bind(sock);final InetSocketAddress remoteAddress = new InetSocketAddress(address, port);if (this.log.isDebugEnabled()) {this.log.debug("Connecting to " + remoteAddress);}try {sock = sf.connectSocket(connectTimeout, sock, host, remoteAddress, localAddress, context);conn.bind(sock);if (this.log.isDebugEnabled()) {this.log.debug("Connection established " + conn);}return;} catch (final SocketTimeoutException ex) {if (last) {throw new ConnectTimeoutException(ex, host, addresses);}} catch (final ConnectException ex) {if (last) {final String msg = ex.getMessage();if ("Connection timed out".equals(msg)) {throw new ConnectTimeoutException(ex, host, addresses);} else {throw new HttpHostConnectException(ex, host, addresses);}}} catch (final NoRouteToHostException ex) {if (last) {throw ex;}}if (this.log.isDebugEnabled()) {this.log.debug("Connect to " + remoteAddress + " timed out. " +"Connection will be retried using another IP address");}}}
建立真正的连接。以http协议为例,这里通过PlainConnectionSocketFactory创建一个普通的Socket,然后绑定到到连接上:
public Socket createSocket(final HttpContext context) throws IOException {return new Socket();}@Overridepublic Socket connectSocket(final int connectTimeout,final Socket socket,final HttpHost host,final InetSocketAddress remoteAddress,final InetSocketAddress localAddress,final HttpContext context) throws IOException {final Socket sock = socket != null ? socket : createSocket(context);if (localAddress != null) {sock.bind(localAddress);}try {sock.connect(remoteAddress, connectTimeout);} catch (final IOException ex) {try {sock.close();} catch (final IOException ignore) {}throw ex;}return sock;}
到这一步,连接就真正建立起来了。
第二步发送请求信息
请求的发送,是通过HttpRequestExecutor进行发送的:
protected HttpResponse doSendRequest(final HttpRequest request,final HttpClientConnection conn,final HttpContext context) throws IOException, HttpException {Args.notNull(request, "HTTP request");Args.notNull(conn, "Client connection");Args.notNull(context, "HTTP context");HttpResponse response = null;context.setAttribute(HttpCoreContext.HTTP_CONNECTION, conn);context.setAttribute(HttpCoreContext.HTTP_REQ_SENT, Boolean.FALSE);conn.sendRequestHeader(request);if (request instanceof HttpEntityEnclosingRequest) {// Check for expect-continue handshake. We have to flush the// headers and wait for an 100-continue response to handle it.// If we get a different response, we must not send the entity.boolean sendentity = true;final ProtocolVersion ver =request.getRequestLine().getProtocolVersion();if (((HttpEntityEnclosingRequest) request).expectContinue() &&!ver.lessEquals(HttpVersion.HTTP_1_0)) {conn.flush();// As suggested by RFC 2616 section 8.2.3, we don't wait for a// 100-continue response forever. On timeout, send the entity.if (conn.isResponseAvailable(this.waitForContinue)) {response = conn.receiveResponseHeader();if (canResponseHaveBody(request, response)) {conn.receiveResponseEntity(response);}final int status = response.getStatusLine().getStatusCode();if (status < 200) {if (status != HttpStatus.SC_CONTINUE) {throw new ProtocolException("Unexpected response: " + response.getStatusLine());}// discard 100-continueresponse = null;} else {sendentity = false;}}}if (sendentity) {conn.sendRequestEntity((HttpEntityEnclosingRequest) request);}}conn.flush();context.setAttribute(HttpCoreContext.HTTP_REQ_SENT, Boolean.TRUE);return response;}首先是写入请求的header:
public void write(final T message) throws IOException, HttpException {Args.notNull(message, "HTTP message");writeHeadLine(message);for (final HeaderIterator it = message.headerIterator(); it.hasNext(); ) {final Header header = it.nextHeader();this.sessionBuffer.writeLine(lineFormatter.formatHeader(this.lineBuf, header));}this.lineBuf.clear();this.sessionBuffer.writeLine(this.lineBuf);}protected void doFormatHeader(final CharArrayBuffer buffer,final Header header) {final String name = header.getName();final String value = header.getValue();int len = name.length() + 2;if (value != null) {len += value.length();}buffer.ensureCapacity(len);buffer.append(name);buffer.append(": ");if (value != null) {buffer.append(value);}}
可以看到,http请求中,header每个key-value分行写入,并且按照Key: Value的格式。
写入完header之后,接下来就会写入请求体:
public void sendRequestEntity(final HttpEntityEnclosingRequest request)throws HttpException, IOException {Args.notNull(request, "HTTP request");assertOpen();if (request.getEntity() == null) {return;}this.entityserializer.serialize(this.outbuffer,request,request.getEntity());}
public void serialize(final SessionOutputBuffer outbuffer,final HttpMessage message,final HttpEntity entity) throws HttpException, IOException {Args.notNull(outbuffer, "Session output buffer");Args.notNull(message, "HTTP message");Args.notNull(entity, "HTTP entity");final OutputStream outstream = doSerialize(outbuffer, message);entity.writeTo(outstream);outstream.close();}
protected OutputStream doSerialize(final SessionOutputBuffer outbuffer,final HttpMessage message) throws HttpException, IOException {final long len = this.lenStrategy.determineLength(message);if (len == ContentLengthStrategy.CHUNKED) {return new ChunkedOutputStream(outbuffer);} else if (len == ContentLengthStrategy.IDENTITY) {// 默认走这里return new IdentityOutputStream(outbuffer);} else {return new ContentLengthOutputStream(outbuffer, len);}} 如果是我们常见的UrlEncodedFormEntity,则是拼接成 key1=value1&key2=value2的格式,获取其byte数组写入到流中。
第三步获取响应
在发送完请求之后,会通过doReceiveResponse获取响应:
protected HttpResponse doReceiveResponse(final HttpRequest request,final HttpClientConnection conn,final HttpContext context) throws HttpException, IOException {Args.notNull(request, "HTTP request");Args.notNull(conn, "Client connection");Args.notNull(context, "HTTP context");HttpResponse response = null;int statusCode = 0;while (response == null || statusCode < HttpStatus.SC_OK) {response = conn.receiveResponseHeader();if (canResponseHaveBody(request, response)) {conn.receiveResponseEntity(response);}statusCode = response.getStatusLine().getStatusCode();} // while intermediate responsereturn response;}
获取响应也是先获取响应的header,然后获取响应体:
public HttpResponse receiveResponseHeader()throws HttpException, IOException {assertOpen();final HttpResponse response = this.responseParser.parse();if (response.getStatusLine().getStatusCode() >= HttpStatus.SC_OK) {this.metrics.incrementResponseCount();}return response;}
public T parse() throws IOException, HttpException {final int st = this.state;switch (st) {case HEAD_LINE:try {this.message = parseHead(this.sessionBuffer);} catch (final ParseException px) {throw new ProtocolException(px.getMessage(), px);}this.state = HEADERS;//$FALL-THROUGH$case HEADERS:final Header[] headers = AbstractMessageParser.parseHeaders(this.sessionBuffer,this.messageConstraints.getMaxHeaderCount(),this.messageConstraints.getMaxLineLength(),this.lineParser,this.headerLines);this.message.setHeaders(headers);final T result = this.message;this.message = null;this.headerLines.clear();this.state = HEAD_LINE;return result;default:throw new IllegalStateException("Inconsistent parser state");}}
最后返回HttpResponse 响应。
相关文章:

apache http client连接池实现原理
在java开发中我们经常会涉及到http 请求接口,一般有几种方式: java自带的 HttpURLConnectionokHttpClientapache http client 一般我们使用apache http client会比较多点,在代码中会进行如下调用方式: private static class Htt…...

adb抓包
目录 抓包步骤 步骤 1: 获取应用的包名 步骤 2: 查看单个应用的日志 步骤 3: 使用日志级别过滤器 步骤 4: 高级日志过滤 可能的原因: 解决方案: 额外提示: 日志保存 抓包步骤 连接设备 adb devices 步骤 1: 获取应用的包名 首先…...

C语言---结构体 、联合体、枚举
一、初识结构体 1、结构体类型 结构体和数组都是集合,但是结构体有成员,类型可以不同;数组有成员,类型相同。 int main() {struct tag{member--list //一个或者多个成员,成员变量}variable--list;//可以省略&#x…...

Web Workers 使用指南
文章目录 前言基础使用高级特性 使用 ES Modules实际应用场景图像处理大数据处理轮询任务 性能优化技巧现代开发方式使用 worker-loader (Webpack) Vite中的Worker使用 限制与注意事项DOM限制:通信限制:同源策略:最佳实践 前言 Web Workers 是浏览器提供的 JavaScript 多线程解…...
)
JVM 与容器化部署调优实践(Docker + K8s)
📌 文章目录 📘 前言1️⃣ 容器环境下 JVM 面临的新挑战2️⃣ JVM 的容器资源感知机制详解3️⃣ JVM 内存调优:如何正确使用堆内存4️⃣ JVM CPU 调优:GC 与编译线程控制5️⃣ Kubernetes 典型配置误区与对策6️⃣ 实战案例&#…...

Android OkHttp控制链:深入理解网络请求的流程管理
OkHttp作为Android和Java平台上广泛使用的HTTP客户端,其核心设计之一就是"控制链"(Chain)机制。本文将深入探讨OkHttp控制链的工作原理、实现细节以及如何利用这一机制进行高级定制。 一、什么是OkHttp控制链 OkHttp控制链是一种责任链模式的实现&#…...

《易经》的数学表达:初级版和高级版
《易经》的数学表达, 一、初级版,可基于以下框架构建, 涵盖符号系统、结构代数及变换规则: 此框架将《易经》抽象为离散数学结构,兼容符号逻辑、概率论与群论,为算法化占断、卦象拓扑分析及跨文化比较提供…...
)
卷积神经网络基础(十)
之前我们学习了SGD、Momentum和AdaGrad三种优化方法,今天我们将继续学习Adam方法。 6.1.6 Adam 我们知道Momentum参照的是小球在碗中滚动的物理规则进行移动而实现的,AdaGrad为参数的每个元素适当地调整更新步伐。那如果我们将这两种方法融合在一起会不…...
安装到指定路径)
怎么把cursor(Cursor/ollama)安装到指定路径
使用PowerShell命令 打开电脑开始菜单,输入powerShell,使用管理员权限打开powerShell窗口,使用cd命令到cursor或ollama安装包的下载目录,如我的Cursor所在的目录为D:\environment\cursor\soft,输入以下 cd E:\downloa…...

第21天-pyttsx3语音播放功能
示例1:语音参数控制(语速/音量/音调) import pyttsx3def speech_demo():engine = pyttsx3.init()# 获取当前语音参数print("默认语速:", engine.getProperty(rate))print("默认音量:", engine.getProperty(volume))print("可用语音:", engin…...
优化显存和加速方案)
Multi-Query Attention:传统自注意力( Self-Attention)优化显存和加速方案
本文导读:Multi-Query Attention(MQA)是 Google Research 2022 年提出的一项轻量化注意力技术,通过“多查询、单键值”的设计,把自注意力层的 KV 缓存从 O(hnd) 降到 O(nd),在不牺牲模型精度的前提下大幅节…...

学习路之uniapp--unipush2.0推送功能--服务端推送消息
学习路之uniapp--unipush2.0推送功能--服务端推送消息 一、二、三、 一、 二、 三、...

如何使用AI搭建WordPress网站
人工智能正迅速成为包括网页设计在内的许多行业在其功能设置中添加的一种工具。在数字设计和营销领域,许多成熟的工具都在其产品中添加了人工智能功能。WordPress 也是如此。作为目前最流行的网站建设工具之一,WordPress 的人工智能插件越来越多也就不足…...

Java 项目管理工具:Maven 与 Gradle 的深度对比与选择
Java 项目管理工具:Maven 与 Gradle 的深度对比与选择 在 Java 开发领域,项目管理工具对于项目的构建、依赖管理等起着至关重要的作用。Maven 和 Gradle 是目前最主流的两款工具,它们各自有着独特的优势和适用场景。本文将对 Maven 与 Gradl…...

Elasticsearch简单集成java框架方式。
Elasticsearch 在 Java 中最常用的客户端是什么?如何初始化一个 RestHighLevelClient?如何用 Spring Boot 快速集成 Elasticsearch?Spring Data Elasticsearch 如何定义实体类与索引的映射? 最常用的 Java 客户端 目前官方推荐使用…...
 ✨ | Hidden Search Widget (交互式搜索框))
50天50个小项目 (Vue3 + Tailwindcss V4) ✨ | Hidden Search Widget (交互式搜索框)
📅 我们继续 50 个小项目挑战!—— Hidden Search Widget 组件 仓库地址:https://github.com/SunACong/50-vue-projects 项目预览地址:https://50-vue-projects.vercel.app/ ✨ 组件目标 点击按钮展开隐藏的搜索框 再次点击按钮…...

python爬虫和逆向:百度翻译数据采集的几种方式
更多内容请见: 爬虫和逆向教程-专栏介绍和目录 文章目录 一、官方API方式(推荐)1.1 百度翻译开放平台API二、网页版逆向方式(代码可直接运行)2.1 拿到js加密方法2.2 python解密代码三、浏览器自动化方式3.1 Selenium自动化操作3.2 Playwright自动化四、移动端API逆向4.1 分…...

spring5-配外部文件-spEL-工厂bean-FactoryBean
spring配外部文件 我们先在Spring里配置一个数据源 1.导c3p0包,这里我们先学一下hibernate持久化框架,以后用mybites. <dependency><groupId>org.hibernate</groupId><artifactId>hibernate-core</artifactId><version>5.2.…...

Ubuntu部署私有Gitlab
这个东西安装其实挺简单的,但是因为我这边迁移了数据目录和使用自己安装的 nginx 代理还是踩了几个坑,所以大家可以注意下 先看下安装 # 先安装必要组件 sudo apt update sudo apt install -y curl openssh-server ca-certificates tzdata perl# 添加gi…...

Activiti 7建表语句及注释
Activiti数据库表Oracle兼容DM建表语句及字段注释。 附件下载版地址点这里 --通用属性表 create table ACT_GE_PROPERTY (NAME_ NVARCHAR2(64),VALUE_ NVARCHAR2(300),REV_ INTEGER,primary key (NAME_) );COMMENT ON TABLE ACT_GE_PROPERTY IS 通用属性表;COMMENT ON COLUMN …...

React中使用 Ant Design Charts 图表
// 引入 Ant Design Charts 的柱状图组件 Column import { Column } from ant-design/charts;// 定义函数组件 App,用于展示柱状图 function App() {// 数据源:每个对象代表一个柱子,包含类型(type)和销售额࿰…...

佰力博科技与您探讨压电材料的原理与压电效应的应用
压电材料的原理基于正压电效应和逆压电效应,即机械能与电能之间的双向转换特性。 压电材料的原理源于其独特的晶体结构和电-机械耦合效应,具体可分为以下核心要点: 1. 正压电效应与逆压电效应的定义 正压电效应:当压电…...

vscode打开vue + element项目
好嘞,我帮你详细整理一个用 VS Code 来可视化开发 Vue Element UI 的完整步骤,让你能舒服地写代码、预览界面、调试和管理项目。 用 VS Code 可视化开发 Vue Element UI 全流程指南 一、准备工作 安装 VS Code 官网下载安装:https://code…...

一步步解析 HTTPS
🧑 博主简介:CSDN博客专家,历代文学网(PC端可以访问:https://literature.sinhy.com/#/literature?__c1000,移动端可微信小程序搜索“历代文学”)总架构师,15年工作经验,…...

使用vue2做一个生成二维码的案例【可当组件使用】
最近有个需求需要用前端来生成一个二维码,就封装了一个简单的组件,这篇文章来分享给大家。 使用的技术: Vue2 Ant Design Vue QRCodeJS2 node版本:16.20 组件样式: 大家可以根据自己的需求来调整代码。 依赖安装&am…...

Hadoop-HA高可用集群启动nameNode莫名挂掉,排错解决
Hadoop-HA高可用集群启动nameNode莫名挂掉,排错解决 nameNode错误日志 2025-05-21 16:14:12,218 INFO org.apache.hadoop.ipc.Client: Retrying connect to server: node01/192.168.191.111:8485. Already tried 5 time(s); retry policy is RetryUpToMaximumCoun…...
:《模板语法与数据绑定》)
从零基础到最佳实践:Vue.js 系列(2/10):《模板语法与数据绑定》
Vue.js 模板语法与数据绑定:从基础到实践 关键点 Vue.js 的模板语法使用 HTML 结合特殊指令(如 v-bind、v-on),实现动态界面。插值({{ }})显示数据,指令控制 DOM 行为,双向绑定简化…...

第二章:Android常用UI控件
1、介绍: 控件是界面组成的主要元素,界面中的控件有序排放和完美组合,便可在用户眼前呈现出丰富多彩的页面。 2、常用控件: 一、TextView控件: 在使用手机时,经常会看见一些文本信息,这些文本…...

LeetCode 1004. 最大连续1的个数 III
LeetCode 1004题 “最大连续1的个数 III” 是一道关于数组和滑动窗口的问题。题目描述如下: 题目描述 给定一个由若干 0 和 1 组成的数组 nums,以及一个整数 k。你可以将最多 k 个 0 翻转为 1。返回经过翻转操作后,数组中连续 1 的最大个数…...

Flink CDC 3.4 发布, 优化高频 DDL 处理,支持 Batch 模式,新增 Iceberg 支持
引言 Apache Flink 社区很开心地宣布,在经过4个月的版本开发之后,Flink CDC 3.4.0 版本已经正式发布。Flink CDC 是流行的流式数据集成框架,CDC 3.4.0 版本强化了框架对于高频表结构变更的支持,框架支持了 batch 执行模式&#x…...
NIFI的处理器:JSLTTransformJSON 2.4.0
该处理器使用JSLT转换FlowFile JSON有效负载的格式。使用转换后的内容创建新的FlowFile,并将其路由到“成功”关系。如果JSLT转换失败,则将原始FlowFile路由到“失败”关系。 需要注意的是,编译JSLT转换可能相当昂贵。理想情况下,…...

k8s-ServiceAccount 配置
在 Kubernetes 中 ServiceAccount 是一种为 Pod 提供身份认证的机制,允许 Pod 以特定的身份访问 Kubernetes API 服务器。 **Role(角色)**是 Kubernetes 中定义权限的资源对象,它只能在特定的命名空间内生效。Role 用于定义一组权…...

Python Lambda 表达式
在 Python 编程中,Lambda 表达式是一个非常强大且实用的工具,它就像一把瑞士军刀,能在各种场景下帮助我们写出简洁、优雅的代码。接下来,就让我们一起深入探索 Python Lambda 表达式的奥秘。 一、Lambda 表达式的基础认知 1…...

【ffmpeg】ffprobe基本用法
ffprobe 是 FFmpeg 工具集中的一个强大命令行工具,主要用于分析多媒体文件(如视频、音频等)的格式和内容信息。它可以提取文件的元数据、编解码器信息、流详情、帧信息等,而无需对文件进行转码或修改。 基本用法 ffprobe [选项] …...

Java 代码生成工具:如何快速构建项目骨架?
Java 代码生成工具:如何快速构建项目骨架? 在 Java 项目开发过程中,构建项目骨架是一项繁琐但又基础重要的工作。幸运的是,Java 领域有许多代码生成工具可以帮助我们快速完成这一任务,大大提高开发效率。 一、代码生…...

模板初阶【C++】
一、 泛型编程 前言: 我们经常会用到数据的交换,C中的函数重载可以完成 //函数重载 void swap(int& x,int& y) {int tmp x;x y;y tmp; }void swap(double& x, double& y) {double tmp x;x y;y tmp; }void swap(char& x, ch…...

URL 类知识点详解
URL 类知识点详解 1. 基本概念与位置 所属包: java.net.URL核心功能: 表示统一资源定位符(Uniform Resource Locator),用于标识和定位网络资源(如网页、文件、API接口)。支持多种协议:HTTP、HTTPS、FTP、file(本地文件)等。不可变类:一旦创建,内容不可修改(线程安全…...
)
如何使用redis做限流(golang实现小样)
在实际开发中,限流(Rate Limiting)是一种保护服务、避免接口被恶意刷流的常见技术。常用的限流算法有令牌桶、漏桶、固定窗口、滑动窗口等。由于Redis具备高性能和原子性操作,常常被用来实现分布式限流。 下面给出使用Golang结合Redis实现简单限流的几种常见方式(以“固定…...
,Pin_auth)
OpenHarmony外设驱动使用 (九),Pin_auth
OpenHarmony外设驱动使用 (九) Pin_auth 概述 功能简介 口令认证是端侧设备不可或缺的一部分,为设备提供一种用户认证能力,可应用于设备解锁、支付、应用登录等身份认证场景。用户注册口令后,口令认证模块就可为设备…...
)
MySQL基础(InnoDB)
✅ InnoDB:支持事务、行级锁、外键。 为什么要用事务? 安全:如果中途发现错误(比如改错分数),可以一键撤销所有操作,就像游戏里的“回档”功能! 原子…...

自建srs实时视频服务器支持RTMP推流和拉流
文章目录 一、整体示意图二、服务器端1.srs简介及架构2.docker方式安装3.k8s方式安装4.端口 三、推流端1.OBS Studio2.ffmpeg推流3.streamlabs苹果手机4.twire安卓手机5.网络推流摄像头 四、拉流端1.vlc2.srs 参考awesome系列:https://github.com/juancarlospaco/aw…...

C++性能优化的7大核心策略与实战案例
在大型C项目中,性能优化需从语言特性、系统架构、硬件特性等多维度切入。以下是经过验证的关键技术路径👇 🔧 一、内存管理的极致控制 问题:频繁的动态内存分配会导致性能抖动和内存碎片,尤其在实时系统中可能…...

《国家高等教育智慧平台:重塑学习新时代》
时代之需:平台应运而生 在数字化浪潮席卷全球的当下,高等教育领域也在经历着深刻的变革。数字化技术的迅猛发展,正以前所未有的力量重塑着高等教育的形态。从在线课程的兴起,到虚拟实验室的应用,再到智能化教学工具的普…...
)
【Django】Django DRF 中如何手动调用分页器返回分页数据(APIView,action场景)
📦 Django DRF 中如何手动调用分页器返回分页数据(APIView,action场景) 在使用 Django REST Framework(DRF)时,很多人习惯了用 GenericAPIView 或 ViewSet 自动帮我们处理分页。但在某些场景中…...

遨游科普:三防平板有哪些品牌?哪个品牌值得推荐?
在工业数字化与户外作业场景日益多元化的今天,三防平板凭借其卓越的防护性能与功能集成能力,成为电力巡检、地质勘探、应急救援等领域不可或缺的智能终端。所谓“三防”,即防尘、防水、防摔,国际标准IP68与军用标准MIL-STD-810H的…...
)
Flannel后端为UDP模式下,分析数据包的发送方式(一)
Flannel 使用的是 UDP 模式,分析发往 10.244.2.5 的数据包会从哪个网卡发出。 路由表 以下是提供的路由表: Kernel IP routing table Destination Gateway Genmask Flags Metric Ref Use Iface 0.0.0.0 192.168.1.1 …...

华为鸿蒙电脑发布,折叠屏怎么选?
1⃣屏幕特性: 分辨率:高分辨率能保证图像和文字的清晰细腻 屏幕材质:OLED 屏幕通常具有更好的对比度、色彩表现和更广的色域 刷新率:支持自适应刷新率的屏幕可以根据不同的使用场景自动调整刷新率,在保证流畅度的同时优…...

将VMware上的虚拟机和当前电脑上的Wifi网卡处在同一个局域网下,实现同一个局域网下实现共享
什么是桥接模式:桥接模式(Bridging Mode)是一种网络连接模式,常用于虚拟机环境中,将虚拟机的虚拟网络适配器直接连接到主机的物理网络适配器上,使虚拟机能够像独立的物理设备一样直接与物理网络通信 1.打开…...

论文阅读:Auto-Encoding Variational Bayes
对图像生成论文自编码变分贝叶斯Auto-Encoding Variational Bayes原理理解和记录 Abstract 我们如何在有向概率模型中,在具有难以处理的后验分布的连续潜在变量z和大型数据集的存在下,执行有效的推理和学习? 我们介绍了一种随机变分推理和学…...

API面临哪些风险,如何做好API安全?
API面临的风险 API(应用程序编程接口)在现代软件开发和集成中扮演着至关重要的角色,但同时也面临着多种安全风险,主要包括以下几个方面: 数据泄露风险: API通常涉及敏感数据的传输和交换,如用…...